
 |
Starting the New Year off strong with a quick recap of some of our favorite open-ended process art activities that you may want to add to your creative list this upcoming year. All toddler and mommy approved! Check them out!
|
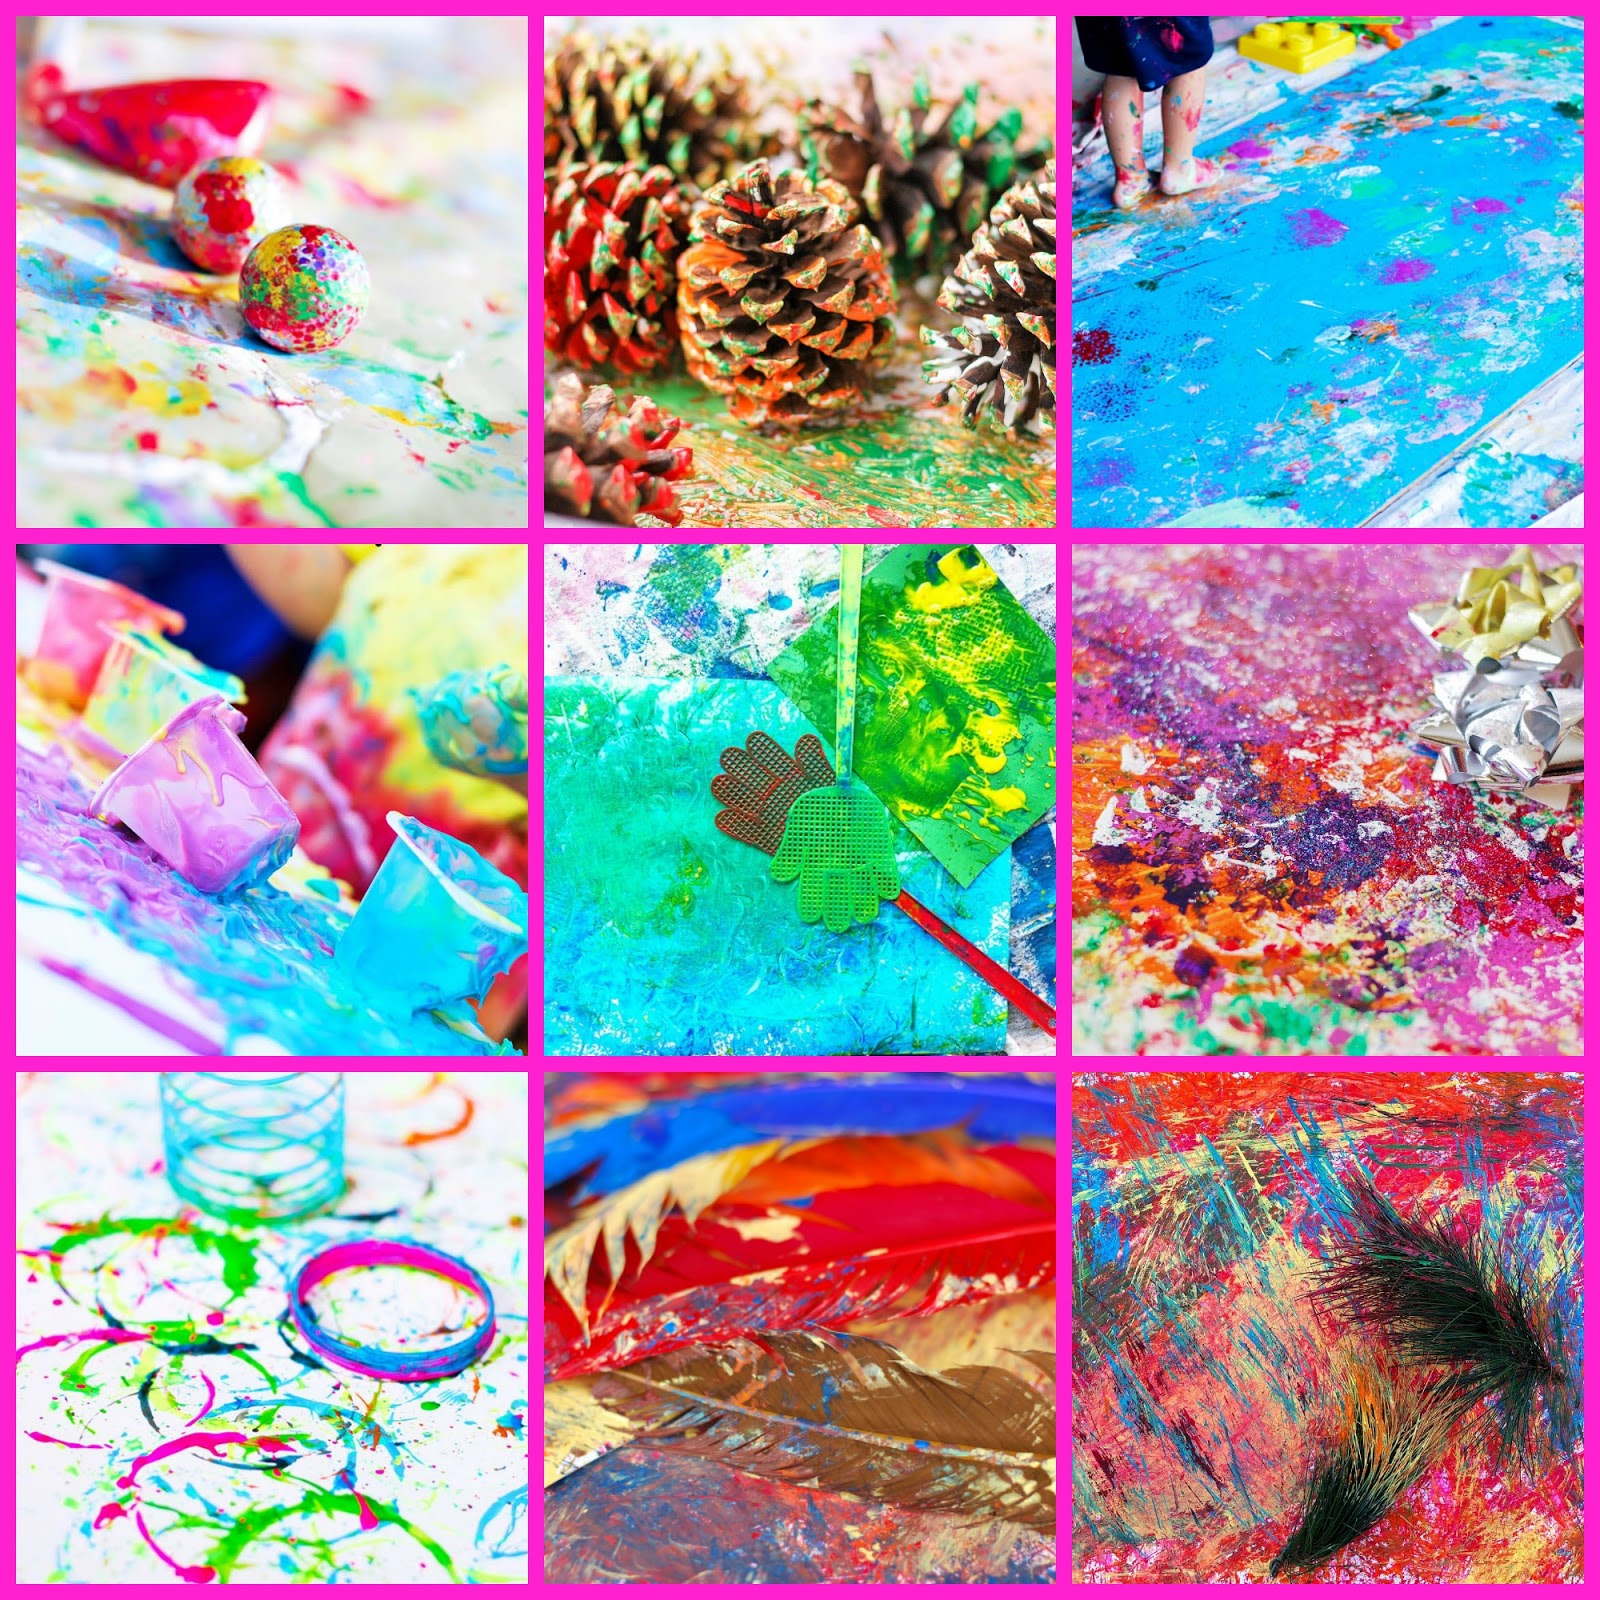
Golf Process Art

I set up a super easy invitation for him to break in his brand new golf clubs. Walmart has this really cheap playday jumbo golf caddy that was perfect for his height! It's super light and easy to wheel around for both indoor and outdoor play while teaching him his very first fundamentals of the sport. My heart gets all warm and fuzzy when I see him pull that caddy behind him! I bet that's exactly what his daddy looked like at that age. Adding a little paint made this the perfect, open-ended process art. Definitely a HOLE IN ONE!

Just simply line the floor with kraft paper, add a few dabs of paint and let the games begin! Wanna learn more about this Tee-rific process? Click here- Tee Time Art
Pine Cone Process Art

When I started introducing Luke to art, I noticed that he is more engaged when he is moving. He isn't much of a sitter, so making action art is perfect for him. He couldn't wait to cover his hands in paint as he rolled those pine cones and then wipe those colorful hands off on his clothes. He loved the idea of picking up the bin and shaking it to some country tunes playing on the radio in the background. The look on his face as he watched the paint splatter here and there was so fun to watch. He made it look so fun that I couldn't wait to take my turn and once I did, I'm pretty sure I felt every emotion he did. So so so FUN!

This print is perfect for extended projects! Wanna see what we came up with next? Check it out here - Pine Cone Art
Movement Art

This process may look like it was all planned out but it took a completely different route than expected. But I'm so happy it did. I have to keep reminding myself that his ideas are way better than mine. For instance, my plan was to take this hand me down piece of ply board and make all different types of cool prints. I remember searching the house for anything and everything that might work. Things like cars, dinosaurs, kitchen utensils, bubble wrap, and foam numbers and letters. "NOPE!" is pretty much the response I got as he couldn't resist the feeling of paint squished between his fingers and toes! I don't blame him!

This process is as easy as squeeze paint and GO! I literally gave him all the paint we had and he used every single ounce. He would run, jump, hop, skip as well as walk on all fours, break dance, and roll! you name it, he did it! If you have a little in your life that loves mess, you should definitely try this out!
Edible Pudding Art

Edible sensory art is always a win when it comes to toddlers. Nothing sounds better than the freedom to eat, play, and create all at the same time. For adults, you may be a bit hesitant, I get it! I watched him for awhile before I got up the courage to stick my hands into that ooey gooey mess. Yes, you can imagine my first initial expression the second my hands touched the warm pudding. But to be completely honest, it wasn't so bad! This is one that we will be returning to in the future! It was a finger lickin' good time!
But don't actually lick it!

This simple set up consist of only vanilla pudding cups and food coloring making this process a two thumbs up for Luke and I. I love there are soooo many ways to go about this process. You can go big or small, messy or contained, and colorful or no color. Not one yummy process will look like the next!
Fly Swat Art

This was our very first messy art experience! I remember thinking, What have I've done?! How am I going to clean all this up?! Why did I not think this through better?! BUT at the same time; Laughter equaled the amount of paint on the walls, paint covered the teeth of that precious smile that stretched ear to ear, and I remember naming this activity "The Time of His Life" because it really was best time! My favorite part of all was when the mailman stopped by our driveway and his face as he gave Luke ran down to get the mail. To this day, the mailman expects nothing less from us :)

First, prepare your space! This is something I did not do. Dip fly swats (purchased at local dollar store) into paint! let them go wild! This process is super fun so get that camera ready and prepare to get messy!
Holiday Bow Process Art

I love the idea of incorporating the holidays into our art session, which is why I was excited to find and read all about this easy open-ended invitation shared by Jackie over on the pocketofpreschool blog! You will find tons of ideas over there that focus on Christmas activities and centers to try out with your kiddos. The second I saw it, it went to the top of our must-try list. I hope after reading ours, you will be inspired like she inspired us!

As you can see, my little guy had a blast discovering new ways to use EVERY-holiDAY materials. Get your complete material list and the official "how to" here - Holiday Bow Art
Slinky Art

When smocks.on was first talked about, we came up with the idea of themed weeks. Our very first challenge was to come up with a theme that suited us and if there is one thing my little tornado is good at, it's making messes and this, my friends, is one MESSY PROCESS! With that, we had our theme. Messy Art!

I had recently saved slinky art to our art folder on Pinterest and knew immediately that this is was how I wanted to introduce Luke and I to the smocks.on community. After a quick demonstration, Luke jumped in quickly and as you can see above, I was not far behind! Since there isn't a blog post on this process yet, I wanna go ahead and bounce right to it and talk a little bit about this super easy set up. We used poster board, washable tempera paint, and some Slinkys we purchased from the local dollar store. That's it! One tip I do have for you is to cut those slinky's into thirds. This will prevent tangles and increase bounce! I hope to have a complete post up about the entire experience soon so check back soon!
Feather Art

This feathery fun process is definitely one will be returning to in the future. The problem with awesome open ended processes is that you DON'T want it to end! But there comes a time when you run out of paint and the sun begins to set that there just isn't any other way to continue, you sadly call it quits. On a positive note, you had fun and you have a beautiful, one of a kind, piece of art that they are so very proud of! So proud, they can't wait till daddy comes home so they can greet them at the door with it. Toooooo sweet!

Luke loves any opportunity to paint without brushes so I knew, with little instruction, that he would take off and do what he does best! And that he did! More of this gorgeous process here- Feather Art
Pine Tree Art

We decided to do a very unconventional Christmas art process and use loose pine stems from our tree as paint brushes. They are just as easily coated with paint as they are to clean off as you prepare a new color. I even pulled a few extra strands for myself and we had a jolly good time painting by that very tree!

It's as easy as pour paint into plates, dip pine stems into paint, turn on some holiday tunes, and let them paint along some of you favorite songs! Remember this is process based art! We turned this Christmas tree art into a Christmas Tree! Check it out here- Pine Tree Art
Tornado Boy and I will be back into art action in February, so check back often to see what Cara and Melissa are creating! We are super excited about a new year without limits! smocks.on is now THEME FREE so try out one of these amazingly fun processes I've shared with you today and share it with us over on Instagram.
Happy Crafting,
Sara @toddler_tornado


No comments